Using Docker to containerize your Node.js application and serve it over HTTPS in the AWS Elastic Beanstalk
In this tutorial we’ll use Docker to deploy a Node.js (Express and Typescript) application to AWS Elastic Beanstalk (EBS) using AWS Elastic Compute Cloud (EC2) and serve it over HTTPS. I’ll try to be as succinct as possible so I won’t explain Docker and its advantages or other specific details. Thus, I expect you to know what Docker is and have it installed. Plus, I expect you to know a little bit about NginX configurations. On the other hand, I expect this to let you get your Node.js application deployed in the EBS using NginX and SSL.
To give you some context, this is the directory tree and everything is on GitHub. I’ll tag my Docker application container efraimrodrigues/app-ebs-docker which matches my remote repository at hub.docker.com so adjust yours accordingly.
.
├── app
│   ├── Dockerfile
│   ├── package.json
│   ├── package-lock.json
│   ├── server.ts
│   └── tsconfig.json
├── Dockerrun.aws.json
└── nginx
    └── user_conf.d
        └── personal.conf
Node.js application
The application we’ll be deploying is this sample express server.
One of the first things we need to do is to build our application image and push it to a Docker repository. I’ll be using hub.docker.com for this tutorial. The following Dockerfile describes how the application image is built. It simply installs dependencies, compiles Typescript code, and finally states how the image must be ran in line 23.
This uses the alpine image because it’s very light.
Building, testing, and pushing application image
If you want to test this locally you need to include the package.json and tsconfig.json. Then, you can build and run the image using the following commands. Notice the -t option in the first command matches my previously created remote repository and this will allow us to push it.
sudo docker build ./app -t efraimrodrigues/app-ebs-docker
sudo docker run -p 3001:3001 efraimrodrigues/app-ebs-docker
After you execute the second command the application should be available at 127.0.0.1:3001 . To stop it, just find the container id using sudo docker ps and then stop it with sudo docker stop <container id>. Then, just push it to hub.docker.com with the next command. Docker might ask you to login.
sudo docker push efraimrodrigues/app-ebs-dockerNginX configurations and deployment
At this point, we already have our application image in our remote repository and we can now address the NginX server. We’ll be using an image by jonasal/nginx-certbot which automates the process of getting SSL certificates from Let’s Encrypt by using Certbot. Please refer to this link for more details about configuring this image. I used to manage my SSL certificates with Certbot at AWS CodePipeline and it was unstable at some point so that’s why I decided to switch to this image and it’s been working well ever since.
AWS EBS uses Elastic Container Service (ECS) for deploying environment and ECS sets up Docker by using a Dockerrun.aws.json file instead of docker-compose.yml.
Private Repositories and Authentication
Lines 3 through 6 are used by EC2 to authenticate to your remote repository host. This is necessary only if you’re using private repositories. They point to a AWS S3 file which has the repository location and credentials. This file can be obtained from your local machine after you logged in to your remote repository. It should look like this.
It seems this is not compatible with the default Docker version used by EC2. I had to update it so EC2 would authenticate and download my private image.
Once you upload this to a S3 bucket, it’s important to give EC2 (aws-elasticbeanstalk-ec2-role) access to read files from S3. You can do this accessing Identity and Access Management (IAM) > Roles > aws-elasticbeanstalk-ec2-role > Attach policies > AmazonS3ReadOnlyAccess. My aws-elasticbeanstalk-ec2-role policies page looks like this.

Copying NginX configuration files to container
Lines from 7 to 14 define a volume in the EC2 machine which is tagged as nginx-proxy-conf. Lines from 34 to 40 instructs it to copy the volume tagged as nginx-proxy-conf to the container folder /etc/nginx/user_conf.d. It’s important you do not change the destination folder because this is where jonasal/nginx-certbot image will lookup for configuration files.
Containers’ definitions
The block for containers’ definitions is pretty straightforward and legible. However, it’s important to point out that the image fields point to remote repositories so this isn’t going to work if the images you’re defining aren’t available or accessible. Plus, notice the links definition (line 21) is used to describe the containers NginX may depend on. Finally, the hostname defined for the node app (line 45) will be available in our NginX configuration file and it’s important it matches the server we’re doing to declare next.
NginX configuration file
The configuration file has to proxy requests to the Node.js application. This happens under the NginX container which can communicate with the Node.js application container.
This may be clear enough if you’re familiar with configuring NginX. Notice all requests are being forwarded to the backend upstream which is a group of servers and might be used as a load balancer. Please refer to this link if you wanna do it.
Notice line 2 defines a server for our Node.js application tagged as app in the Dockerrun.aws.json file.
It’s important you update line 9 according to your domain.
Creating EBS Environment
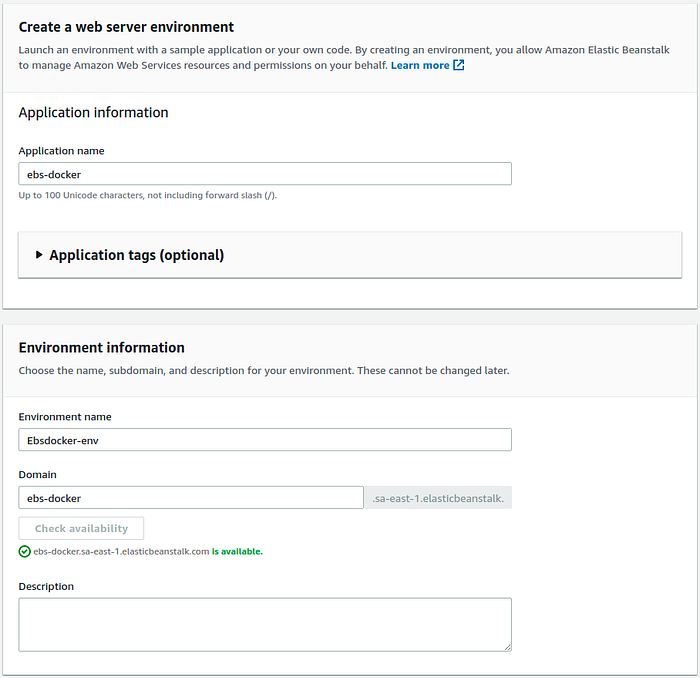
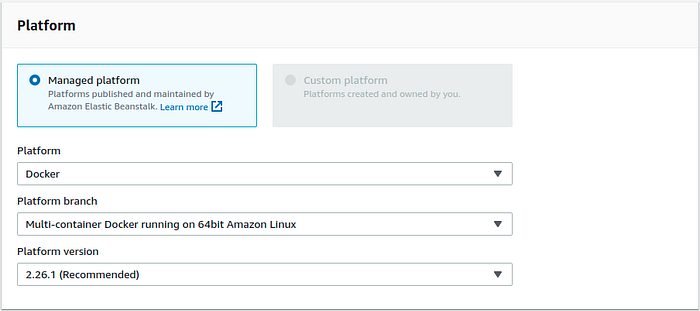
Loggin to your AWS account, head over to the EBS service, and start by creating a Web server environment. The initial page should be something similar to this.
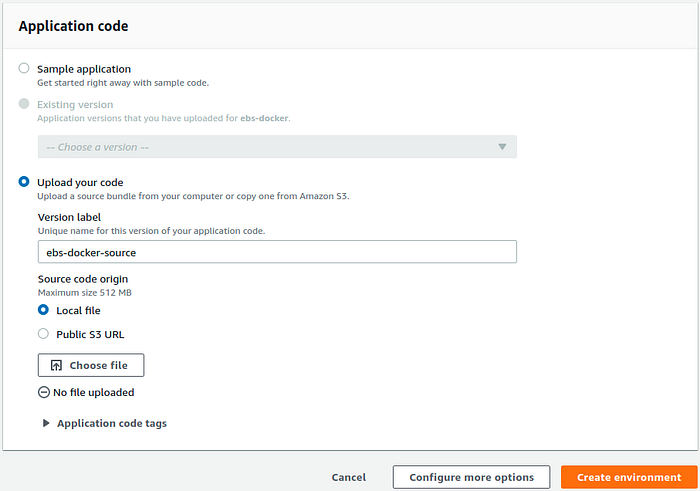
Upload the project source code in this last window. But don’t create the environment yet. We need to defined some environment variable that will be used by the NginX container to get SSL certificates. So go ahead and click on the Configure more options button.
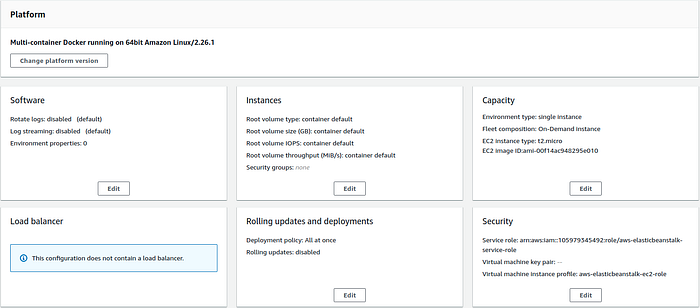
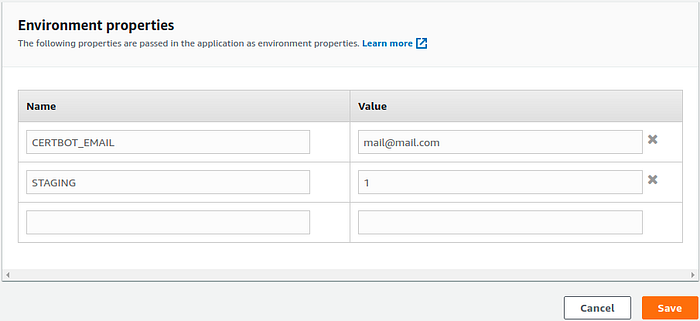
Now hit the Edit button in the Software window and define the CERTBOT_MAIL variable with your preferred email. It’s optional but recommended to define STAGING to 1 for testing as Let’s Encrypt limits the number of certificates you can fetch in the production environment. Your configuration should look like this.
This should be enough to get our environment up and running. So you may save and create the environment. But I recommend you define a key pair under the security options so you can access your environment via SSH and browser on your Docker containers.
One last thing to do is to allow HTTPS requests to your EC2 instance. Access EC2 > Network & Security > Security Groups and find the security group attached to your EBS environment. Then, update the inbound rules to allow traffic over the HTTPS (443) port.

There we go, we’ve got it working properly.

Notice your browser might issue a security problem and this is because we aren’t using the production environment of Let’s Encrypt. You can update the STAGING environment variable to 0 if you want to use the production environment.
I hope this helps you deploy your application to a safer environment. Please let me know if you have questions.
